
Long Reining: Part 3
Hi this is Will Faerber from Art2Ride and we are continuing our discussion of long reining.
We have already gone through steps one and two, step one was just lunging the horse and getting the horse to take consistent contact and stretching into the contact with the side reins before we even begin to think about long reining. Remember, we want the horse to be quiet in the mouth before we start taking any pressure against their mouth, that is why we never overly shorten the side reins. Correctly fitted side reins are adjusted so that the horse can still get it’s head up but not get it all the way up. This encourages the horse to stretch into the contact rather than when we see people over tighten the side reins and over tighten the inside side rein thinking they are bending the horse. Side reins should always be the same length and they should never try to set the horse’s head. That is never what we want to do, we are not teaching saddlebreds and Tennessee Walkers, we are teaching dressage horses. We are not looking for a set frame, we are looking for a fluid frame that can move from one frame to another as opposed to a saddlebred where the head and neck is set and that it’s expected to stay there all the time.
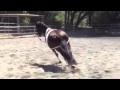
Now that we have gone in both directions and have gotten the horse quiet about having the line just over the top of the back, it is time for step three. This is the step that can be quite scary for the horse because it is the point where we put the line around the back of the hind quarters. I am going to bring the line around back of the hind quarters, which some horses can become very very freaky about! You must be very careful, be sure that you have the line in this hand (shown in video) so you are able to give it if necessary. Also, notice how I am working in a pen here that is completely enclosed, please do not try this out in some open field where the horse can get away from you because there is nothing more dangerous than the horse running away from you with you holding all these lines connected to it. That is a good way to get a horse killed. So once we have the horse quiet, we are just going to take the line around the hind quarters just above the hock.
We now ask the horse to move on and now she must accept the contact with that behind her butt. The horse immediately starts to react to the line behind her right away. Notice how relaxed I am keeping this outside rein, some horses will completely freak out about this outside line, so be prepared for that to happen and just keep the line nice and relaxed. If she wants to canter and is not going crazy, I am not going to immediately ask her to trot. I am just getting her used to the line letting her do what she wants to do, she is not in any big hurry and is not freaking out. Then I am going to ask her to come back down to a trot. This exercise can be a useful technique for a horse that tends to be a little slow, but it will only work a few times and as soon as the horse gets used to the line going around behind, pretty soon the horse won’t react to it at all. That is why all these devices that are attempting to do this don’t really work because as soon as the horse gets used to the line going around it’s hind quarters it gets ignored.
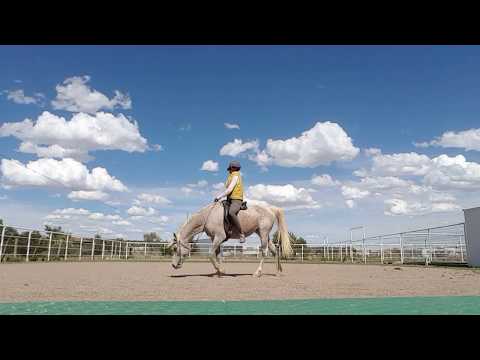
Once again, I am not making any big demands, I am just letting her get used to the line. She starts to canter and as soon as she gets used to that I will gradually ask her to trot. Now I can begin to feel the rein a little bit to work with her mouth, but only a little bit at a time. She starts to run a little there from the rope behind her, so I just have to let her relax and get her back. Be very careful not to take too much with your hand, the biggest danger here is that you will pull the horse’s head down with the rein. They kind of act like draw reins, you can easily overbend a horse doing this. Your hand needs to be so light and be so careful. Like I stated in a previous video, you have to be physically fit enough so that you can stay on your feet out here doing this. It is very important that you have correct posture when you are lunging and riding a horse, your body posture makes a big difference in how the horse responds.
Now she is starting to slow down and the line around her back isn’t causing her too much grief any longer and she is getting used to the idea. She begins to stretch into the contact which allows me to take contact with the outside rein. Notice how lightly I am using these reins and being careful not to overbend this horse. If you are working a very hot blooded horse, it may take you days just to get used to this. Each horse is an individual, so you have to wait at each step of this and perform all the steps till the horse is comfortable and calm before moving on to the next step or you might find yourself in big trouble. Imagine how easy it would be for the horse to get wrapped up in these reins if the horse took off, and then if you let go you would have a horse running around the ring with all these big long reins wrapping around it’s legs, not a pretty sight. Now we ask her to walk and whoa. So that was step number three.
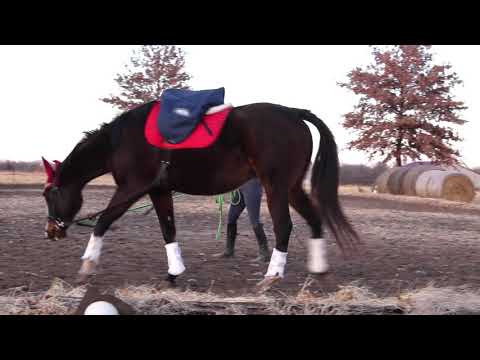
You have to be very careful when those lines are around the back of the horse. You must keep the line up (as shown in video) a little bit above the hock and don’t let it get down around her hind leg because that would be trouble. Notice how when I am approaching the horse I am keeping that outside line up in that hock as I come towards her. I have to keep these lines up, if they were to come down she could easily step a foot through it and if she were to start to spin around in circles you can see how easily I could get into trouble.
This is will Faerber from Art2Ride and this has been a demonstration of step number three of long reining and stay tuned for phase number four. Thank you very much!

One response to “Long Reining: Part 3”
Leave a Reply
thank you for the video! i see you work hard and you really love what you do.
good luck in all your beginnings!

thank you for the video! i see you work hard and you really love what you do.
good luck in all your beginnings!